Note: This page is a WIP and subject to regular changes and updates.
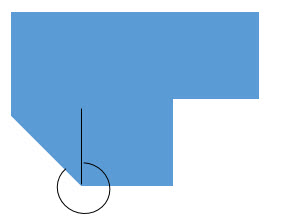 The bearing of the irregular walls in the kitchen, conservatory and footprint needs computing:
This can be done in one of four ways and there is at least one lesson for each.
- Match bearing: You would match the bearing of the irregular wall to that of another room or building footprint. If there was no survey control and the footprint needed computing from the internal rooms, you could use this to create the building footprint from the internal rooms. Refer to lesson 6.
- Type bearing: If the bearing can be measured accurately this is an acceptable approach and the value can be manually entered. Refer to lesson 3.
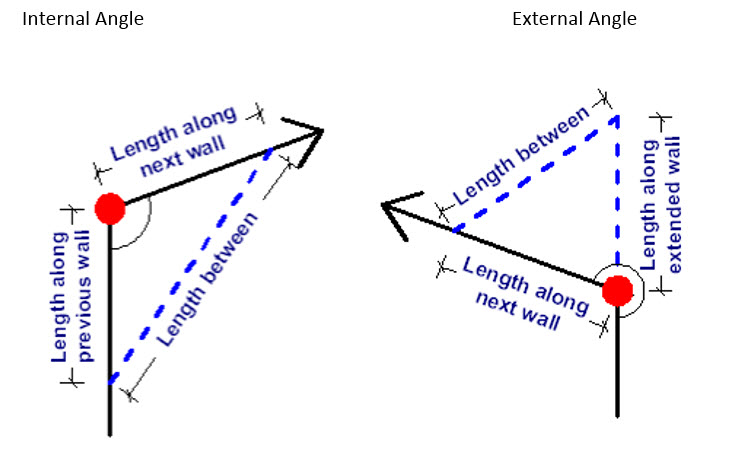
- Calculate angle: The angle is computed as you are surveying the room, by taking an extra measurement of the room, a cross-brace for internal angles and extending walls to a floating point for external angles: Refer to lesson 4.
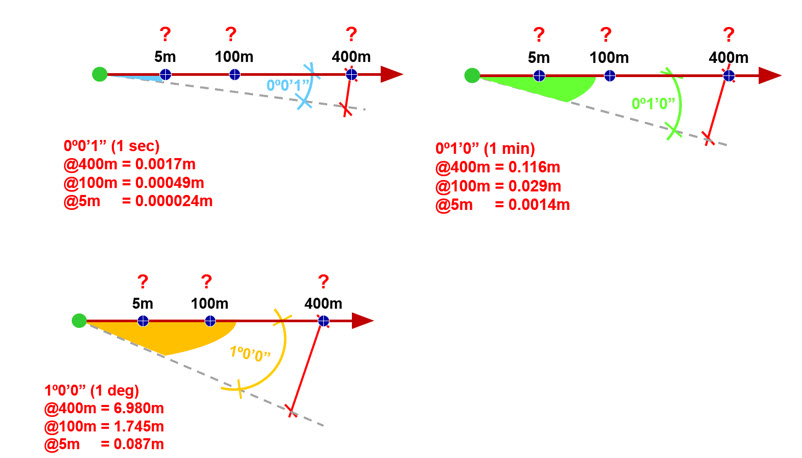
The accuracy with which you can measure a cross-brace is generally less than that of a wall, as the plaster has gone round the corner and the measurement itself is on an angle rather than directly perpendicular.
In addition to this cross-braces are longer measurements, the longer the measurement the greater the effect of any angular error:
Likewise the accuracy with which you can measure to a floating point for an external angle is likely to introduce more error, than reduce it. Whilst there is a lesson on using this tool for Internal Angles, it is recommended that this feature is used once other options have been deemed unsuitable.
- Room Adjustment Tool: The Room Adjustment Tool allows you to freeze angles, this acts in the same way as adding in a cross-brace without the additional error a cross-brace can bring. Assume any walls that look as if they meet at right angles are right angles. All of the angles of these walls can be frozen so they do not move in an adjustment. This is suitable for the kitchen. Refer to lesson 1.
In some cases there will be several irregular walls (non-right angles) in a row in these cases, there is no alternative but to use cross-braces when using the Room Adjustment Tool. In the case of the conservatory the Room Adjustment Tool is used to compute the wall angles in five separate adjustments, with the use of 2 cross-braces. Refer to Lesson 2.
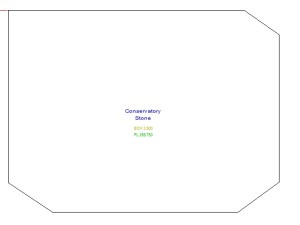 Lesson 2 – Room Adjustment Using Cross-Braces.
Key: Frozen wall angles:
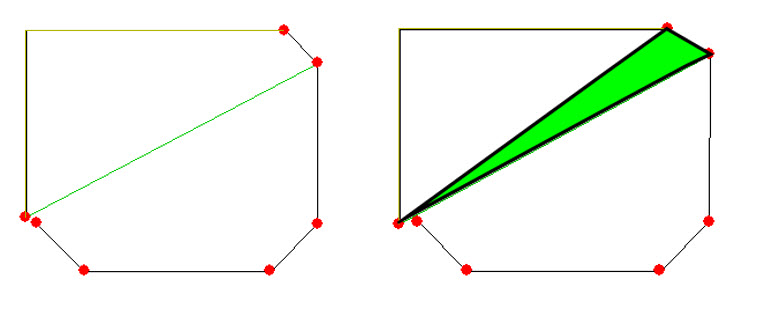
Adjustment 1: Showing cross-brace and computed triangle.
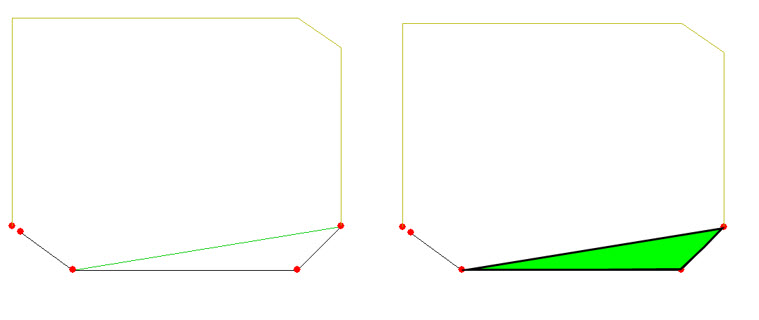
When using cross-braces, try to visualise the triangles they are creating. Neither of the triangles used in this example are ideal, both are long and thin with one side much shorter than the other two and the triangle in the second adjustment is obtuse with an angle of >90°. Ideally try to use triangles with as equal sides as possible and angles >90° as this will give you the best geometry for computations, i.e.:
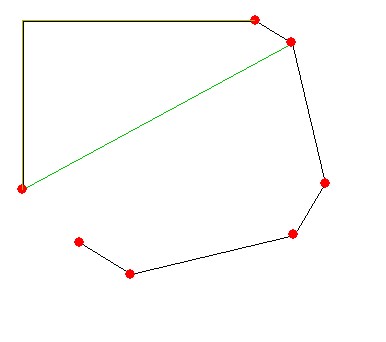 Adjustment 2: Entered wall bearing: In a clockwise direction – change the bearing of the fourth wall to 180º.
Adjustment 3: Showing cross brace and computed triangle.
 Adjustment 4: Entered wall bearing. In a clockwise direction – change the bearing of the 6th wall to 270º.
Adjustment 5: Bearing of last wall adjustment.
Information on where and how to start surveying an irregular shaped room
Lesson 1: Using the Room Adjustment Tool with NO Cross-Braces
Lesson 2: Using the Room Adjustment Tool with Cross-Braces
Lesson 3: Using the Type Bearing Tool
Lesson 4: Using the Calculate Angle Tool
Lesson 5: Moving/Transforming a Room to a Measured Point
Lesson 6: Using the Match Bearing Tool
 Blended Technical Training Services
